| |
|
|
Step 2: Retrieve replies from POP server |
 |
|
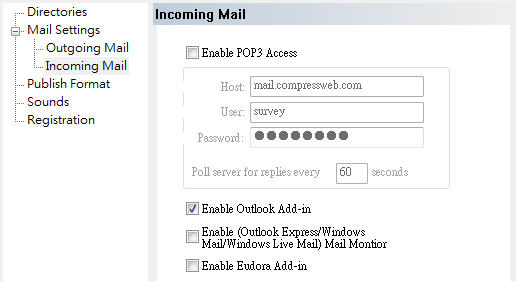
Please follow the instructions below to complete incoming mail settings.
- Click Options item in Tools menu
- In Incoming Mail tab, only check "Enable POP3 Access".
- Enter the host server.
- Enter your id and password for authentication.
- Enter how often to poll the server for replies, ex. 60 seconds.
|
| |
|
|
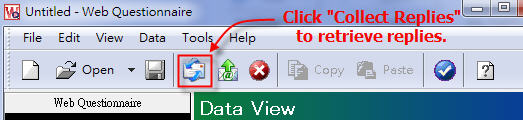
Step 3: Click on the "Collect Replies" button in WQ toolbar to connect to POP server to get email replies.
|
| |
|
| |
 |
Configure WQ to retrieve replies from Outlook |
| |
|
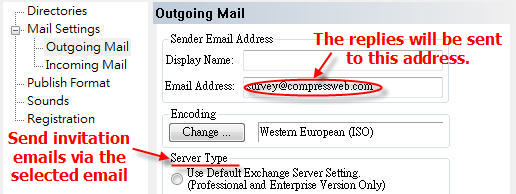
Step 1: Use the existing mail server to send invitation emails
In Outgoing Mail tab, you can select the default Exchange Server or the SMTP server to send invitation emails.
|
|
Step 2: Make sure that "Email Questionnaire" add-in button is shown in the toolbar of your Outlook
|
|
Step 3: Retrieve replies from your Outlook
|
|
Please follow the instructions below to collect replies.
- Click Options item in Tools menu
- In Incoming Mail tab, check "Enable Outlook Add-in" and disable all other items.
- Invoke your Outlook and retrieve the emails from the account specified as the "Sender Email Address" (set in Outgoing Mail tab).
- Outlook "Email Questionnaire" add-in would automatically copy the content of the questionnaire replies into EQ and move them to the deleted folder.
|
 |
|
| |